
Outrage Fusion 50 - 12 Cell Set-Up
 Outrage Fusion Kit with Gear Prior to Building
Introduction
After flying the the Velocity 50 for 18 months it was starting to show signs of a lot of wear and tear and the crashes were getting closer and closer together to the point that something was failing everytime I was visiting the club. This was not due to Outrage's bad quality of parts but the fact that as crashes happened I was using as little parts as possible to get it back in the air - but this came at a price!
The tail was starting to drift from vibrations and it really was not enjoyable to fly anymore, I was spending £50-£80 per crash when new kits were in the grand scheme of things wasn't that much more so it was time to make a decision either buy the new Velocity V2 and use all my own gear or make the switch to electric and buy everything new. After 2-3 weeks of thinking this over working out the price of both kits including anything else it would required I choose electric and there was really only one 50 size out there that looked the part and had one of the best flying performance to match.
Gear? No Idea...
So on to the Fusion 50 - There are so many different setups out there that I could of choosen from including a nice 6 cell sports/light 3D flyer or a full on extreme 12 cell 3D machine but after looking around at what everyone else had, what would be nicer on the Lipo Batteries and what would be better for how I want to progress I decided a 12 cell machine would be better in the long run. So what gear did I go for? The Full lists below:-
- Outrage Fusion Flybar Kit (Pinned Boom)
- Castle Creations Phoenix ICE 80HV Speed Controller
- Outrage 4125-560 Kv Motor with 6mm Shaft
- 2 x 3300mah Turnigy NanoTech 6 Cell Batteries (12 Cell)
- 3 x Align DS610 Digital Cyclic Servo's
- 1 x Futaba Tail Servo
- Spartan Quark (Clear) Gyro
- Spektrum AR7100 Reciever with Built-in Regulator
- Castle Creations "CC Bullet" 5.5mm High Currently Connectors
- Quantum High Current EC5 Connector (Batteries)
- Outrage NRG 2 Cell 2500mah Battery
- Main Blade Align 600D
On top of the above I also felt that my little Mystery B6 Charger wouldn't be up to the job of charging so many batteries and more importantly safely so invested in a Opti-Power CellPro 10XP Charger with all the nessary adaptors.
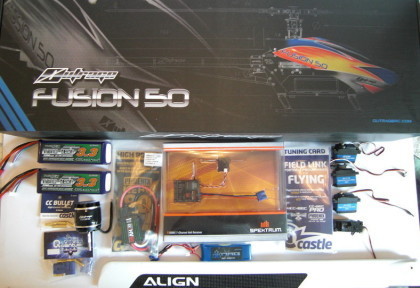 Outrage Fusion 50 With Equipment Prior To Build
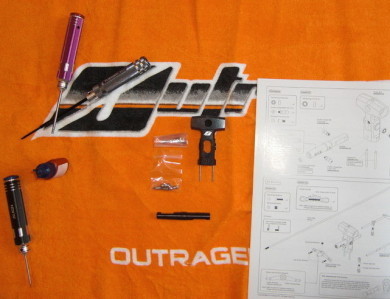
Time to Start The Build
Here am not going to go into very much detail at all as the instructions were very clear apart from a few points here or there following little dotted lines but all and all it was straight forward to be honest.
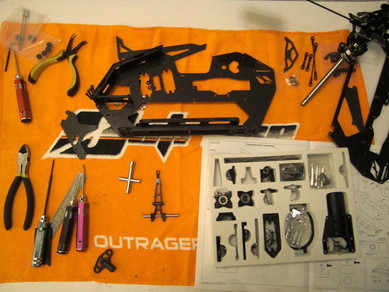
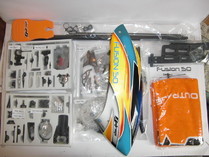 Outrage Fusion 50 - Box Contents
No real big surprises here but I did like the fact that everything was nicely packet in two foam trays and they even give you a cool Outrage Orange towel to save making a mess of your work bench or in my case the coffee table. One thing I noted is they give you a set of tail blades, would of been even better if they stuck in a set of mains to complete the package.
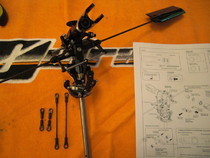 Fusion Head Assembled
When building the "Flybar Carriage" you will need to make a few decision on how you want to set the model up, theres so many different link locations and lengths which will give you either a fast agile 3D machine (Advanced) or a smooth circuit flyer (Beginner). I decided to go with Intermediate settings which gives me the best of both worlds plus gives me a change to get used to the power of this 12 Cell beast.
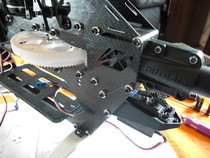
 Start of Main Frame Build
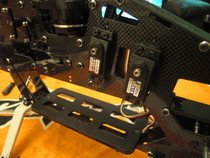
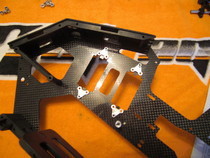 Installing the Servo Mount Tags
Next up its time to start work on a the main frame, first off you have to install the main battery tray then the electronics tray. Once you have done those main bits start work on the frame doubler/stiffener. These steps are really straight forward but be careful to follow the correct lines and use the right screws, nearly put a few wrong myself.
 Main Frame Part Complete
 CC ESC & Outrage Motor & 5.5mm Connectors
Seen a few reports that the standard Outrage motor to ESC connectors which come with the motor weren't that great after a few months so thought it would be best to buy some Castle Creations 5.5mm High Currents now to save any future problems. These are rated to 150amps so more than enough for this application. You may need at least a 40w Soldering Iron to get a good solder joint.
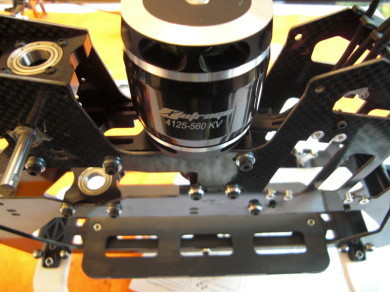 Outrage 4125-560kv Motor Installed
 Align DS610 Servos Installed
Used my Align DS610 servos from the Velocity 50 for my cyclics, they've never let me down yet so why change AND can take a 2 cell Lipo voltage without the need for a BEC so less strain on my Spektrum AR7100 reciever with its build-in 2A BEC (Gyro and Tail servo will run off this).
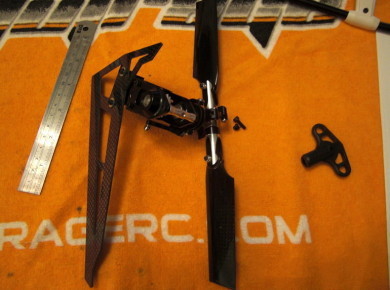 Tail Assembly Completed
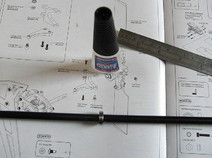 Superglue the Bearings in Place
Superglue (CA) one bearing 230mm from the front and the other 275mm from the back but make sure you don't use too much glue cause it to set inside the bearing it's self. Allow to dry for a couple of hours and then slide on the bearing supports with a lot of grease to allow it to slide freely down the tail boom.
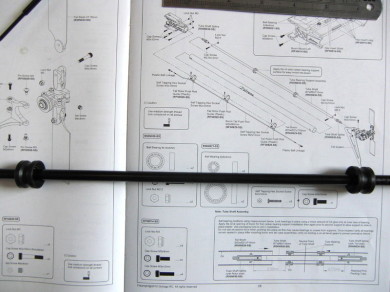 Bearings Glued and Bearing Supports Greased
Once both ends of the tail boom are clamped into place its time to slide the whole tail into the Fusion. Its exactly the same set up as the Velocity 50 with a nice addition double frame - I broke 2 main frame sides on the Velo so hoping this helps which hard crashes - Only time will tell.
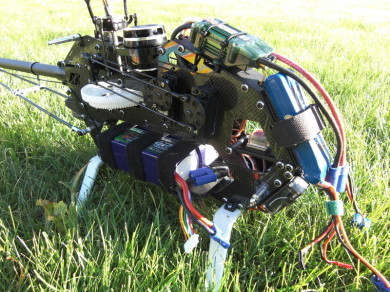 Outrage Fusion 50 Electrics Installed
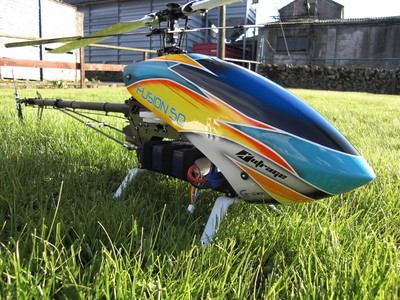
 Complete Outrage Fusion 50 - One of The Best Looking Helis Out There!