Tricopter 3.0 - New & Improved but Still Not Right
Saturday 3rd December 2011

Specifications
Manufacturer: Myself
Model: Tricopter 3.0
Materials: 1.6mm Glass Fibre (GRP) and Wooden Arms
Size: 550mm Motor Centre
Controller: CopterControl (Changed to KK-Black Dec 2011)
Custom Designed Vibration Mount
Battery: 3 Cell Lipo 2200Mah & 2650Mah Nano-Tech HobbyKing
After a long hard think of what i was wanting out of my new platform I decided to look at what everyone else was upto and took the best of the best features while adding in my own. Key was it had to be foldable for easy transport, suspend a GoPro for full HD Video and to have the all new CopterControl board but it wasn't all plain sailing. Some further changes will be required over the winter period to sort the structure weaknesses but am hopeful something will be ready to my high standard soon for some snow pictures and videos.
 Tricopter Base Design
Part using the rcexplorer.se template which I made wider, longer and added the extra round edges required for my anti-vibration mounts; Its made from 1.6mm Glassfibre which is easy to cut with the help of a dremal but more importantly its strong and yet still flexable for those unexpected/ unplanned contacts with the ground.
 Arm Spacing Using a Protractor
Maybe not the most high-tech method of measuring out the 120 degree spacing required between the arms but probably the easiest without the use of a CAD template. Basically clamped all three wooden arms between the two GRP sheets and using a protractor measured 120 degrees so I could get the locations to drill the 3.2mm holes which would be used for the m3 hex head pivot screws.
 Clamps holding Arms Until Drilled
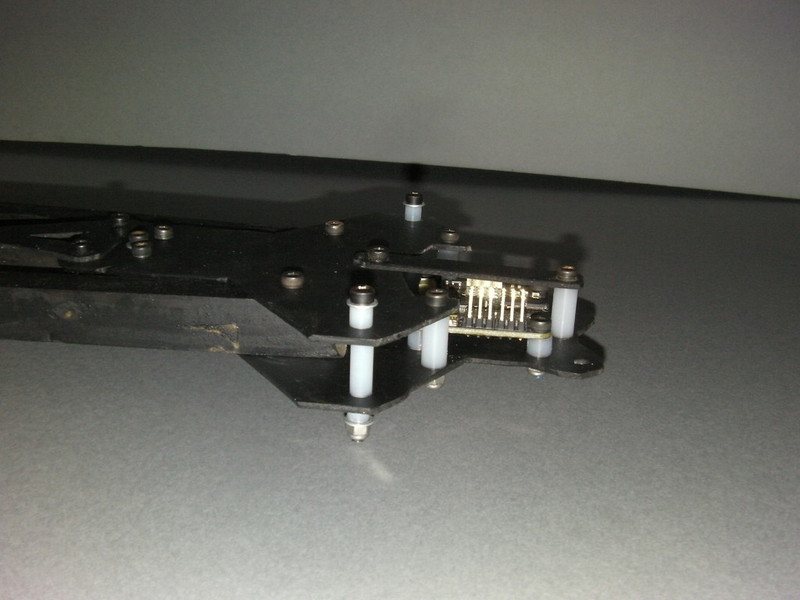
Once the holes were drilled I used m3 hex head screws and nylon spacers to hold it all together. You will notice in the photo I also trimmed the top front edge to allow access to the CopterControl board but looking back I should of left some soft of support to limit the amount of flex and vibrations transmitting to the Gyro's.
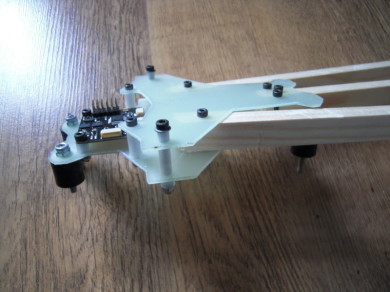
 Frame with CopterControl Installed
The CopterControl Board fits in nicely due to its small size, measuring only 36mm with a hole spacing of 30.5mm meaning the frame can be ultra small as compared to the now dated KKBoard but I do still have a soft spot for the classic.
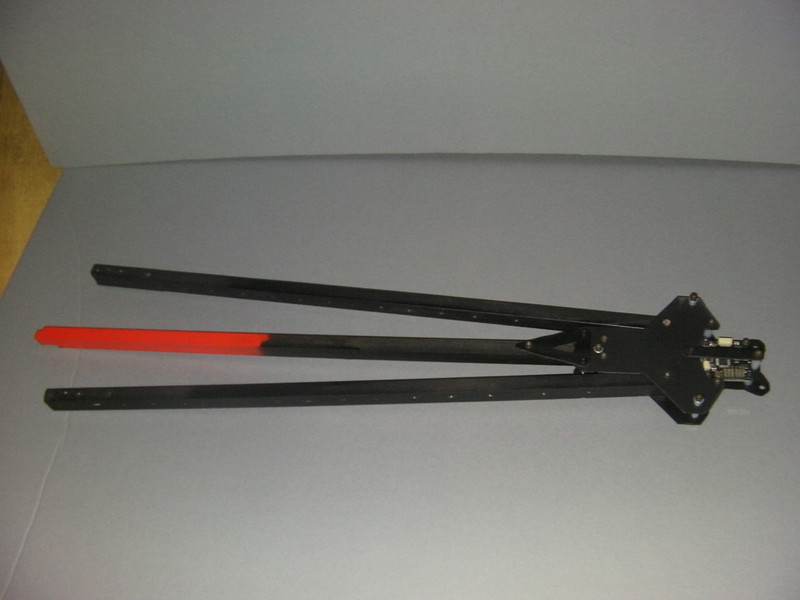
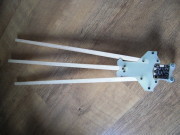 Frame with 50cm Arms
Cut and trimmed three lengths of 12 x 15mm wooden arms, fixed them again using M3 Hex Head screws and M3 nylon bolts to save them coming loose with vibrations.
Wooden Arms is one of the best materials for the arms as they are cheap to replace, flex and absorb vibrations from the motors, exactly what you need for AP.
 CopterControl Board, Arms and Anti Vibration Mounts
 Arms with Temp Motor Mounts
Reused these motor mounts from Tricopter 2.0 but had planned on using new motors but at time of building these were still in Transit from HobbyKing so decided to use the same RC Timer 2830/14 750kv motors as previously installed on 2.0 until the new motors arrived.

Next up was the GoPro and battery mount which was made from 4mm marine grade plywood, its like weight, strong and of very high quality. Once cut I drilled lots of 6 mm holes to help keep the weight down as well as 4 x 4mm holes to accommodate the anti vibration mounts/Landing gear.
 GoPro / Battery Mount Plate
Once the GoPro/Battery mount plate was connected to the main frame by the anti-Vibration dampers it was noted that there was still too much flex right where the CC Board was sitting which would cause unexpected control issues so decided to add in an extra plate above this to stiffen it all up as well as another below.
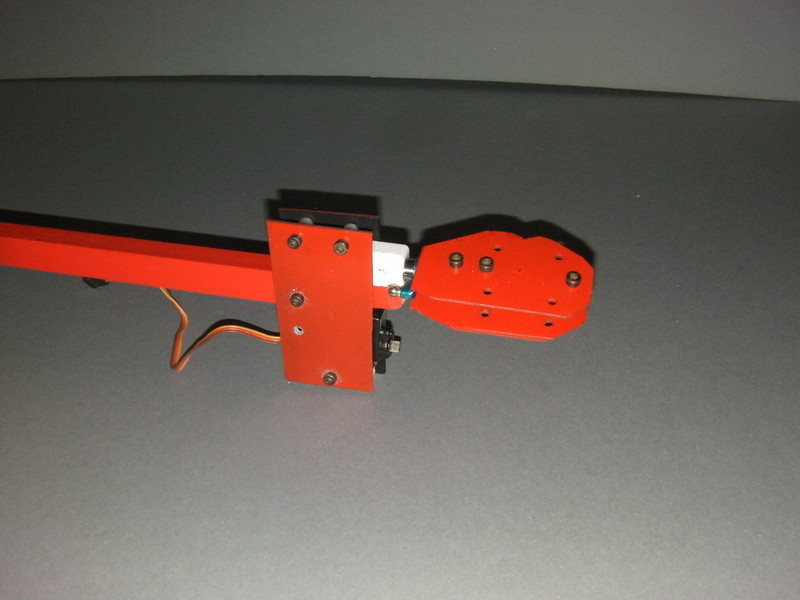
 Tricopter Yaw Mechanism (450 Grip)
Now for the Yaw Mechanism which am using my tried and tested method. Basically its a B&Q corner block, 65mm x M3 and an Align 450 Pro all bolted together then screwed to the wood. Then I take the Servo and sandwich it between two pieces of GRP, bolt it to the rear arm nice and tightly.
 Spray Painting of Tricopter Glass Fibre Parts
 Spray Painting of Wooden Parts
Using a "Matt Black" finished I spray painted both front arms as well as all glass fibre parts with "Plasti-Kote" Paint, I found this gave a super nice finish and hardened nicely.
For the rear arm and to help with orientation it was sprayed with the same type of paint but in "Satin Super Red".


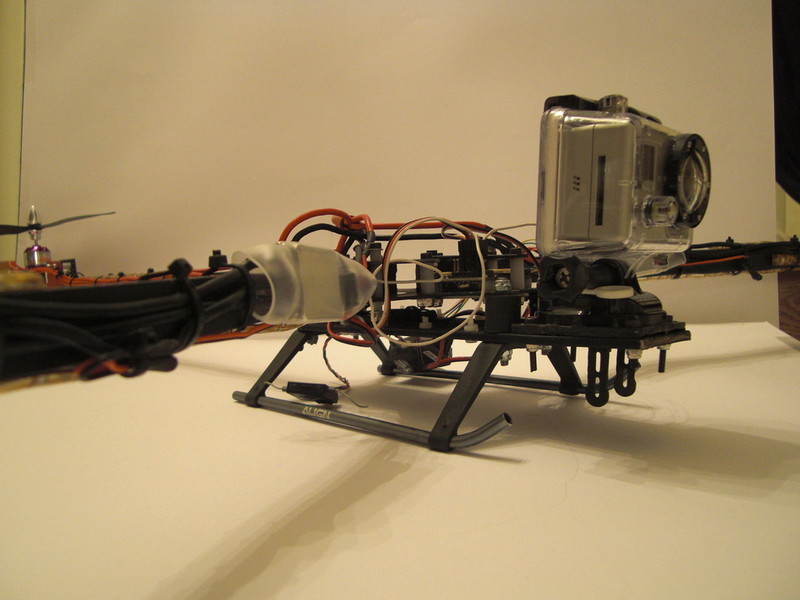
Main Equipment Installed
Although still in the testing phase below you will find pictures without any FPV equipment installed and you will notice the LED's are still disconnected. Once I am happy with the basic set up and its not going to come down like a brick I will start loading the cameras, OSD and Transmitters so look out for further updates in the next few weeks.